How to Clean a New Home [Pro Cleaning Tips for a Fresh Looking Home]
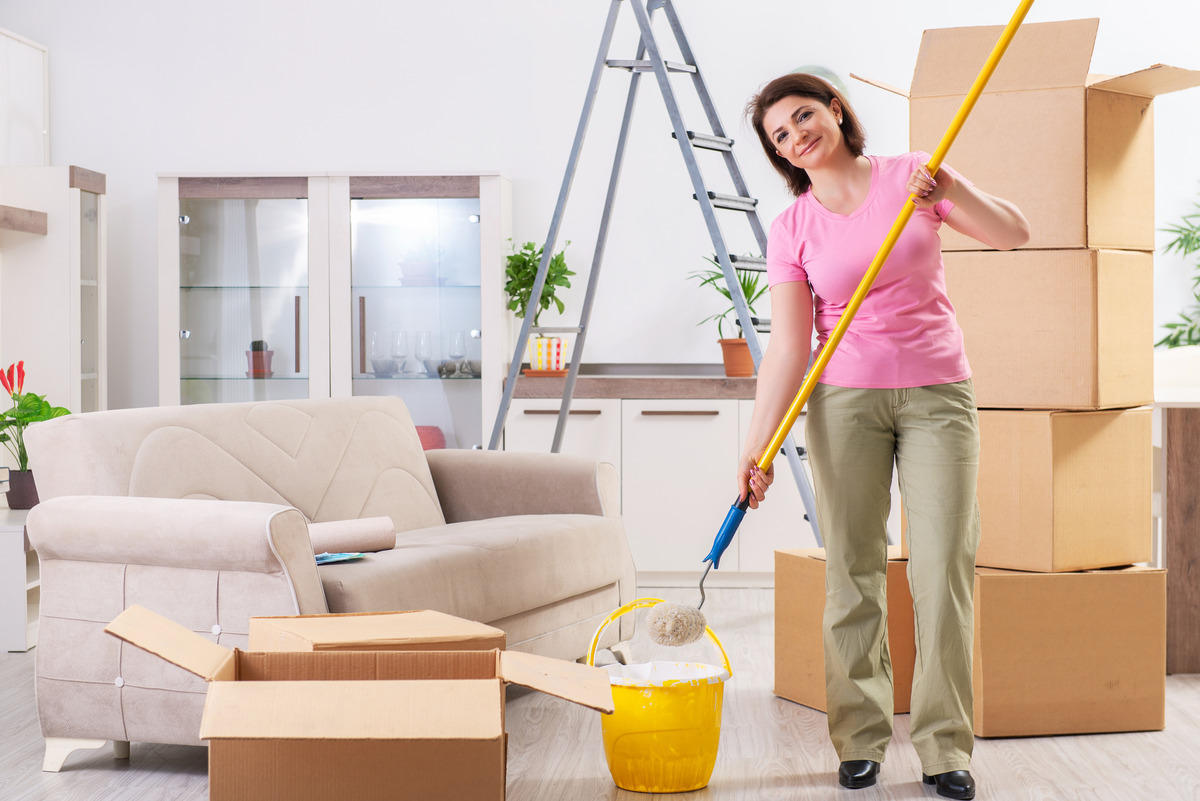
Moving into a new house comes with a list of tasks, such as cleaning your new home.
This is incredibly daunting for many. So, to help you through this process, we will discuss all the essential points of a pre-moving-in cleanup, including a detailed guide so you can enjoy your new home.
Keep reading to discover all the steps and useful tips and tricks!
Reasons Why You Should Clean a New Home
A move in cleaning, even for an empty house, makes a BIG DIFFERENCE. Let’s discuss the reasons why!
Ensuring Health and Hygiene
Construction dust, pet dander, and allergens can all be present in a new home, which can be dangerous to your health.
A thorough cleaning will help eliminate these harmful substances and create a safe and healthy environment for you and your family!
It also helps remove mold or mildew, prevent the spread of germs, and, most importantly, make your new home feel FRESH and CLEAN.
Identification of House Issues
Even if your new house is in good shape, there’s still a need to deep clean because you don’t know what kind of damage or residue the previous owners may have left behind.
When you clean a house, check all the nooks and crannies, and try looking for mold, mildew, pests, dust, cobwebs, grime, and other things that you need to get rid of immediately.
Also, test the appliances and fixtures to ensure they’re working properly. This will save you from calling a repairman when it’s too late.
While you’re at it, inspect the household’s fire extinguisher to maintain safety standards.
Personalizing the Space
In our experience, it’s important to deep clean any space to start personalizing it. By doing so, you can have a fresh start and make the entire home feel like your own.
When cleaning, you’ll pull appliances and furniture around to vacuum and remove dust and dirt. This reveals a blank canvas of each room, showing their potential for PERSONAL TOUCHES you may want to add.
Dust and grime buildup can dull the beauty of colors and surfaces. But after cleaning, you’ll be surprised by how much you like the wooden floor or how the kitchen countertop looks.
This can save you thousands on getting customized furnishings.
Must-Have Cleaning Supplies to Clean a New Home
With some basic items, you can achieve spotless surfaces in your new house!
Cleaning Products
Make sure you have these on hand or on your pre-move-in shopping list:
- Baking soda (sodium bicarbonate) – This is a versatile cleaner that can be used to deodorize, remove stains, and brighten surfaces.
- Cleaners – We recommend using a multi-purpose cleaner for countertops, appliances, and furniture. Separately get a glass cleaner for mirrors and windows and a toilet bowl cleaner.
- Dish soap – Surprisingly, this is a mild yet powerful soap that works as an excellent additive for custom cleaning solutions.
- White vinegar – This is a natural cleaner that can disinfect, remove stains, and deodorize.
- Bleach or bleach alternatives like hydrogen peroxide – Use this with caution, as these are pretty strong and can easily damage surfaces.
Always PRACTICE CAUTION when working with cleaning agents!
Read the labels and follow directions carefully before using any cleaning product. Use gloves, a mask, and eye protection, especially when using strong chemicals.
To ensure you don’t damage anything, test any new cleaning product in an inconspicuous area before using it on a large surface.
Rinse all surfaces thoroughly to remove any residue and prevent streaks.
After use, store cleaning products in a SAFE PLACE out of reach of children and pets.
Cleaning Tools
These pieces of equipment will make your cleanup project much easier:
- Toilet brush – This helps in scrubbing away gunk and stains on your toilet seats.
- Mop – This can be used to clean hard surfaces, like tiles and concrete floors. You can also utilize this to wipe surfaces dry.
- Spray bottle – Use it to cover more ground when applying cleaning solutions.
- Sponge and dry cloth (preferably microfiber cloth or any clean cloth) – Wipe surfaces dry after cleaning to avoid dust or germ buildup.
- Toilet paper – This can be used to absorb spills and wipe down surfaces.
- Vacuum cleaner – Use this to remove dirt, dust, and debris from floors, carpets, and furniture. Get a HEPA vacuumto completely eliminate dust mites, pollen, and other allergens.
- Garbage bags – A must-have for disposing of trash and debris.
How to Prepare for the Cleaning Process
Before you begin the initial cleaning for your apartment, follow these tips to make the process smoother:
Inspection of the Property
The responsibilities of tenants during a move-out depend on their lease agreement and state laws. Ideally, landlords or property managers require them to sign off on a property’s condition before vacating.
If this is fulfilled, it means your new home was left in “good shape” by the previous occupants according to the landlord’s standards.
Either way, we recommend inspecting the property yourself so that everything is up to YOUR STANDARDS. It will also help in drafting your cleaning game plan, saving time and minimizing the hassle.
Here’s how we do it:
- Take a walk around the property and note areas that need attention.
- Turn on all the faucets and check for leaks. You should also check the toilets to make sure they flush properly.
- Test the provided appliances to make sure they’re working properly.
- Inspect the walls, ceilings, and floors for damage like cracks, holes, or stains.
- Look for signs of pests, such as rodents or insects. Call an exterminator before moving in if they are present.
Planning and Scheduling
Once you’ve inspected the property, decide which areas need to be cleaned the most and how much time you have to do it.
Cleaning a house can be rather TIME-CONSUMING (trust us, we’d know), which is why you’ll want a well-planned cleaning schedule. It can make all the tasks organized and feel much more doable.
Check out these tips on creating your strategy:
- List down all the areas that must be cleaned and the supplies you need.
- Estimate how much time you have BEFORE you move in. This will help you to prioritize tasks and create a schedule.
- Get family members or friends to help to make the job less overwhelming.
- Schedule the cleaning tasks in a way that makes sense FOR YOU. You may want to start with the most important areas first or break the cleaning activities into smaller tasks that you can do over a few days.
- Take breaks and reward yourself for a job well done!
If you feel it’s too much for you to handle, there are professional cleaning options in Boston that can lighten the load.
Step-by-Step Guide on “How to Clean a New Home”
Ready all the rooms and areas of your new spot to showcase your lifestyle and personality! Let’s get started:
Starting with the Interior
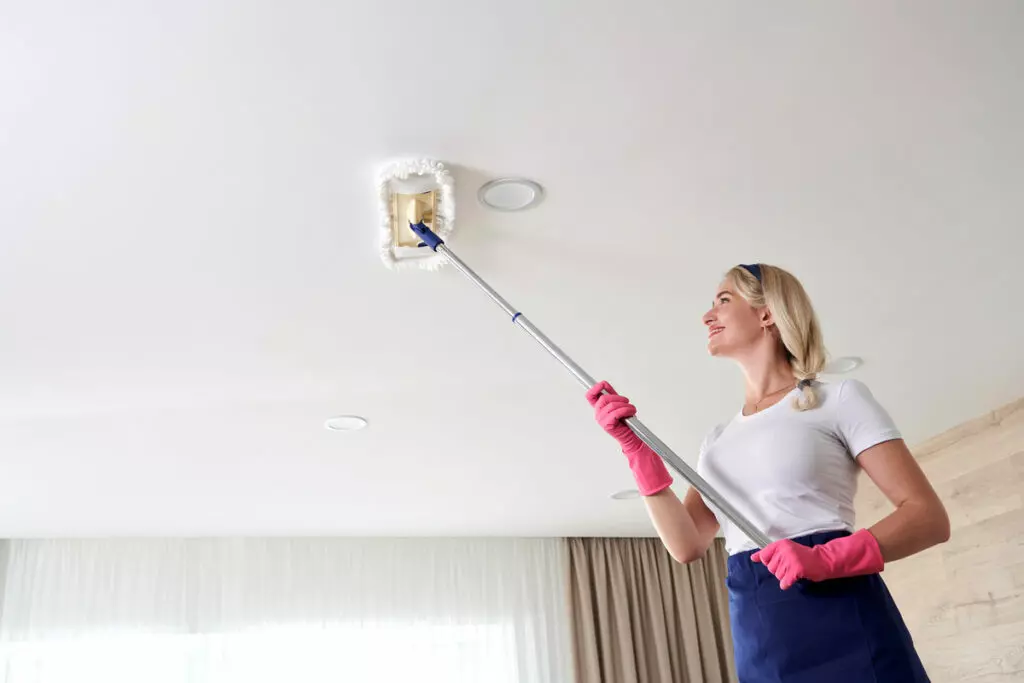
Once you’ve gathered your cleaning products, open the windows and doors to ventilate the space while you clean.
Begin by dusting from the top, starting with light fixtures, light switches, and ceiling fans (including ceiling fan blades). Use microfiber cloths on these often-neglected spots.
Then, work your way down to the shelves, countertops, and furniture.
To clean hard surfaces, create a cleaning solution with hot water and a gentle all-purpose cleaner. Wipe them down with a microfiber cloth to finish.
If you spot a stubborn stain, a mixture of warm water and a bit of baking soda can work wonders. Ensure surfaces are completely dry to prevent moisture buildup.
Make your windows clean by wiping the window sills and frames to let light shine through. Clean or replace the window treatments if you like.
Also, remember to replace air filters in your HVAC system and check smoke detectors while you’re indoors.
Cleaning the Kitchen and Laundry
Begin by giving your kitchen appliances the care they deserve. Pull them away from the walls to clean behind and underneath them.
Additionally, clean the oven and the refrigerator with a sponge to ensure everything you cook is sanitary.
Use warm soapy water and a microfiber cloth to wipe surfaces, including countertops and cabinetry. For the kitchen sink, make a cleaning solution by mixing hot water and gentle cleaner to free it from grime.
Don’t forget to scrub the range hood with vinegar and water solution, as this is a gathering place for grease.
When it comes to kitchen cabinets, make sure you have your cloth dampened to wipe interior and exterior surfaces; don’t forget the handles and knobs. For a sparkling, lint-free finish, wipe them dry with paper towels.
In the laundry room, clear lint from the dryer vent and ensure the area is clean. Remember to wipe the exterior of your washer and dryer.
Cleaning the Bathrooms
Begin by tackling hard-to-reach spots, like ceiling fans and light fixtures, using a trusty clean cloth. Don’t forget about the medicine cabinet as well as the light switches.
For sparkling toilet seats, create a mix of water and your preferred cleaning agent. Give the toilet seat a thorough clean with a disinfectant to ensure a hygienic space.
If you want mirrors that shine like new, use a spray bottle to spritz vinegar-water solution and wipe them with a cloth or paper towels to remove smudges without leaving streaks.
Next, scrub the shower, bathtub, and sink using warm water and baking soda. Let the solution sit before giving it a good scrub — the EXTRA TIME works wonders!
Additionally, wipe down the window frame and mop the floor with disinfectant to finish.
Cleaning the Bedrooms and Living areas
Like other rooms, start by dusting easily overlooked spots (like the ceiling fan, light switches, and light fixtures). Move furniture and appliances to get rid of dust surrounding their areas.
To let natural light stream in, clean your windows with water and vinegar.
When it comes to your upholstered furniture pieces, use a HEPA vacuum cleaner to eliminate allergens, dust, and debris from your mattress, couch, carpet, and pillows.
For hard surfaces, use a damp cloth with a touch of soapy water for a gentle yet effective clean. Mop the floor thoroughly and let dry.
Take a moment to inspect and clean the air filter. Also, test your smoke detectors to ensure they’re properly working.
As you wrap up, don’t forget to pay attention to the closet’s interior and the cabinet doors and tidy them up as needed.
Exterior Cleaning
Don’t forget to clean exterior spaces too!
Sweep the entryways to welcome family and guests with a tidy entrance, and make sure to clear debris on exterior walls and windows. Specifically, use a glass cleaner to clean your windows and enhance your home’s appeal.
For outdoor areas like patios and decks, sweep or hose them down to remove dirt and dust.
When you finish the exterior cleaning, your home will be ready for personalization!
Extra Cleaning Tips and Tricks
Aside from completing your comprehensive move-in tasks, we know many of you want to make the extra effort and do a deep clean, especially for dirty spaces.
These hacks should help you go beyond basic cleaning!
Deep Cleaning Techniques
For heavy-duty cleaning in bedrooms and living spaces, we always VACUUM and STEAM-CLEAN carpets, pillows, and cushions to make them fresh and hygienic.
Many of our deep cleaning techniques also focus on the kitchen and bathroom, as these are typically the dirtiest parts of a house.
For the kitchen:
- Use a degreaser to clean the stove and oven. This removes grease or food buildup that’s difficult to clean with regular dish soap.
- Remove all fridge shelves and drawers and wash them with soap and water. Wipe interiors with vinegar and water to disinfect and deodorize.
For the bathroom:
- Use a toilet bowl cleaner and let it sit. This will remove stains or buildup that make the toilet look dirty.
- Clean the shower and bathtub with a mold and mildew remover to eliminate and prevent them from growing.
- Take a toothbrush and scrub the grout. Trust us; it’s well worth it.
Green Cleaning alternatives
We believe in using natural cleaners whenever possible as they are effective, often less expensive than commercial cleaners, and are better for your health and the environment.
Earlier, we mentioned baking soda, white vinegar, and dish soap as cleaning must-haves.
Another favorite of ours is lemon juice because it’s effective in removing stains, brightening surfaces, and disinfecting.
If you have a problem with lingering smells, coffee grounds are great for absorbing and neutralizing odors.
We also suggest investing in a steam cleaner if possible. It works very well and helps lessen the use of chemicals.
DIY Cleaning Solutions
Here are our effective concoctions using common household items:
- All-purpose cleaner: Mix equal parts water and vinegar in a spray bottle.
- Grout cleaner: Mix 1 part baking soda with 2 parts vinegar in a bowl. Apply the paste to the grout with a toothbrush and let it sit for 30 minutes. Then, scrub the grout and rinse.
- Oven cleaner: Mix 1 part baking soda with 2 parts salt. Sprinkle the mixture on the oven racks and let it sit for a few hours or overnight. Then, scrub the racks with a damp sponge or cloth and rinse.
- Floor cleaner: Mix 1 part dishwashing soap with 2 parts water in a bucket. This solution can clean hard floors, such as tile and linoleum.
- Toilet seat cleaner: Mix 1 water with 1 part lemon juice. Wipe the seat with the mixture using a soft cloth and rinse.
- Stain remover: Mix 1 part baking soda with 2 parts hydrogen peroxide. Apply the paste to the stain and let it sit for a few minutes. Then, scrub the stain with a damp sponge or cloth and rinse.
Post-Cleaning Actions
Unfortunately, home cleaning isn’t a one-and-done job. Here are some good practices to implement.
Maintenance Tips
Keep your home in great shape by practicing these maintenance tips:
- Ventilation is essential. Always have fresh filters, as they keep the air clean and pollutant-free, saving you from doing more intense or frequent cleanups. Good ventilation also ensures that surfaces dry quickly. Moisture leads to mold and mildew growth, which can damage the property.
- Use disinfectants regularly. Not only do they prevent the spread of germs, but they also make your environment inhospitable to mold and mildew.
- Dust and/or vacuum surfaces and appliances. Dust and dirt collected over time can make spaces look dirty and affect airflow.
- Clean your range hood. It should be cleaned regularly to prevent grease buildup and odors.
Establishing a Cleaning Routine
Thorough cleaning keeps your home sanitary and beautiful. Therefore, having a SOLID ROUTINE is a must to stay healthy and in good spirits. Here are our tips for creating one:
- Set realistic goals. If you’re not used to it, don’t try to clean your entire home in a day. Start small and build a routine from there.
- Make it part of your regular schedule. The best way to establish a routine is to dedicate time to these tasks each week.
- Assign tasks. If you have a family, get everyone involved. This will help make it go faster and easier.
- Make it fun. Put on some music or a podcast to make the time pass quickly.
Frequently Asked Questions
Read on for further move-in cleanup guidance that many people want to know:
Which Rooms Should I Clean First in a New Home?
We recommend starting with bathrooms and kitchens, as these are usually the dirtiest and most used.
You can choose according to your needs and preferences, but by cleaning these areas first, you can enjoy your new home without worrying about big messes.
How Can I Deep Clean My Kitchen Before Moving In?
The best way to do this is to have a comprehensive to-do list. Here’s an example:
Start by decluttering.
Clean the appliances, counters, and cabinets.
Clean the backsplash, grout, and floors.
Don’t forget the garbage disposal and vents.
What Are Some Efficient Ways to Clean My New Home’s Bathrooms?
The first thing you should do (which many people forget) is to let cleaning solutions sit so they can activate and work their magic. Otherwise, you’d be needlessly relying on elbow grease.
Investing in cleaning equipment can also greatly lighten your load.
What Are Some Green Alternatives for Cleaning New Homes?
The great news is that you probably already have these items! Baking soda, vinegar, lemon juice, and hydrogen peroxide are classic examples.
How Can I Maintain the Cleanliness of My New Home after the Initial Cleaning?
It would be best to build a routine you can feasibly stick to. This ensures minimal buildup and lessens the necessity for intense cleaning sessions.
You can also seek the help of professionals for specific problems and/or to do your regular cleaning.
Conclusion
The moving process can be tough, and some experience-based guidance is always helpful.
In this article, we discussed why cleaning a new home is essential, how to prepare for it, plus effective and efficient steps for cleaning and maintaining its tidiness.
Feel free to come back and refer to this guide if you’re feeling overwhelmed, and know that hiring a professional cleaning company is always an option!
Written by
Maria DeSouza

Maria De Souza is a committed and accomplished entrepreneur in the cleaning industry, possessing an extraordinary blend of leadership, vision, and knowledge. As the proud owner of Onix Cleaning Services in Boston, Massachusetts, Maria has over two decades of experience in the industry, delivering unparalleled service and maintaining the highest standards of cleanliness.
