How to Clean Your Bathroom Fan: A Guide
There are a million things in your house that gather dust and debris over time, and your exhaust fan is no exception.
Your exhaust fan helps remove dust and airborne contaminants to keep your bathroom clean and well-ventilated. Failure to give it a thorough cleaning could lead to some serious health and safety problems.
Here is a guide on how to clean and maintain your fan and efficient housekeeping tips you should keep in mind.
Overview of a Bathroom Fan and Its Functions
A bathroom exhaust fan is a necessary machine that removes excess moisture and foul odors, leading to a cleaner and dust-free bathroom.
It is also responsible for maintaining and improving the air quality in the house and preventing mold growth.
Because of the fan’s role, dust will gather around it over time, leading to mold and mildew forming. Eventually, your exhaust fan may become clogged and cease functioning correctly.
That’s why cleaning it regularly is so important.
Why a Bathroom Fan Needs Regular Cleaning
Like all machines in the house that need a good cleaning every so often, bathroom exhaust fans cannot perform efficiently with all that dust and dirt buildup.
Too much dust can lead to clogging and bad air quality, but it could also cause mold, germs, and diseases throughout your bathroom.
It may even cause house fires! Therefore, a clean fan is not only effective but safe too.
The Consequences of Not Cleaning Your Bathroom Fan
Too much visible dust in your exhaust fan can lead to dirty or moist air, which can become a breeding ground for mold and bacteria.
Not only that, but you will also have improper bathroom ventilation, as odors will linger and leave the whole restroom smelling funky and gross.
Therefore, you must make it a point to routinely clean your bathroom exhaust fan.
Preparatory Steps Before Cleaning the Bathroom Fan
Before you clean a bathroom exhaust fan, ensure you are prepared safety-wise and materials-wise. Here’s a breakdown of steps to remember.
Safety Measures to Take
- Start by turning the power OFF; this includes the operating power switch or circuit breaker box.
- Use a sturdy stepladder. Do NOT use a stool or a chair, as these are not as stable.
- If you wish, you can have someone hold down the ladder as you clean.
- Make sure the floor is dry to prevent slipping.
Tools and Materials You Will Need for Cleaning
When cleaning out your fan, you only want to consider the best bathroom cleaning products, including:
- Household cleaning agents/commercial cleaner
- Damp microfiber cloth
- Soapy water
- Electrostatic duster or soft-bristle brush
- Vacuum with hose and crevice attachment and brush attachment
- Dish soap
- Microfiber towel
- Compressed air/forced air
- Screwdriver
- Flashlight
Step-by-Step Guide on How to Clean a Bathroom Fan
Cleaning an exhaust fan only takes a few steps!
Determine the Type of Fan You Have
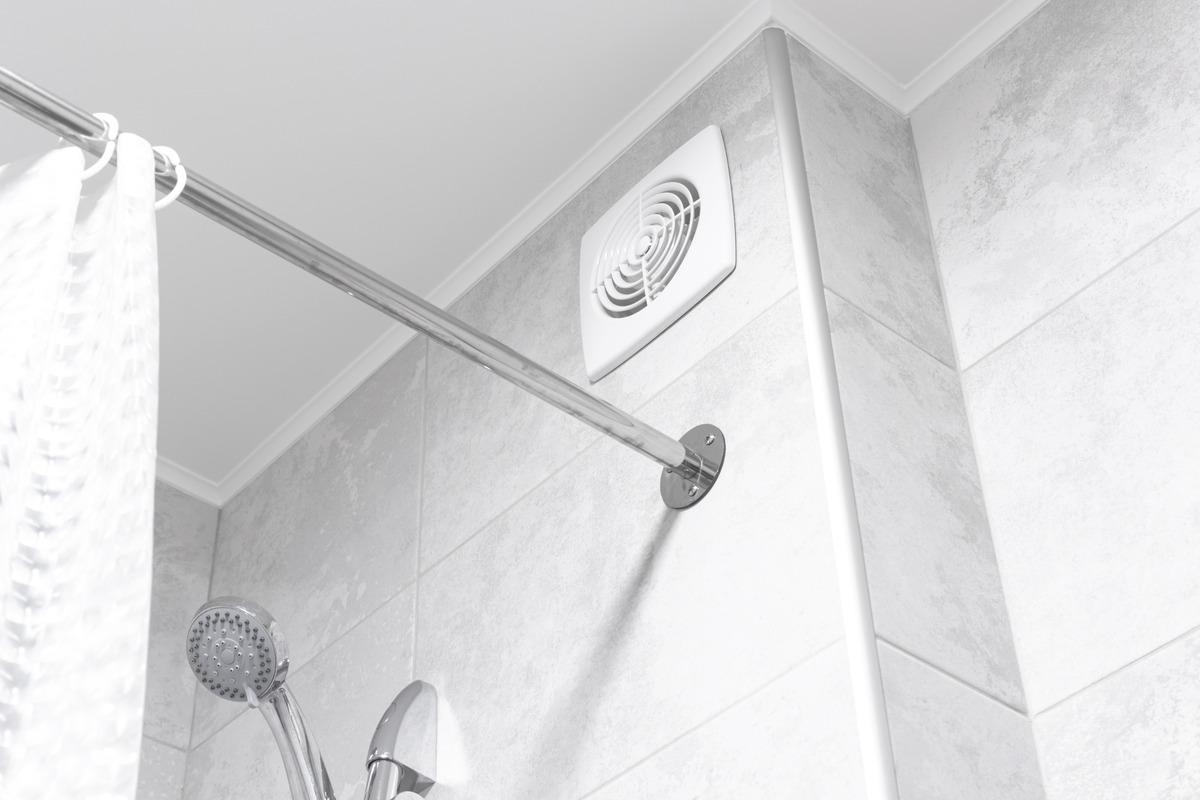
There are two common exhaust fan types that you probably have. You may either have a ceiling mount or a wall mount.
Ceiling-mounted fans are the most popular and are connected to an exhaust duct above the bathroom. Some ceiling mounts can integrate other things, such as lights, heat lamps, or a music speaker.
Meanwhile, wall mounts are installed directly on the wall and vent air directly outdoors.
Other houses may have an inline fan. It is not as visible and is remotely located. It uses a grill to connect to the bathroom’s ceiling.
Steps on How to Clean a Typical Bathroom Fan
Here is a step-by-step guide for cleaning your fan.
1. Remove Any Excess Dirt
Start cleaning your exhaust fan by vacuuming out any visible dirt or exterior dust. Any vacuum attachment with a hose and crevice tool should help you suck out as much dust as possible in hard-to-reach areas.
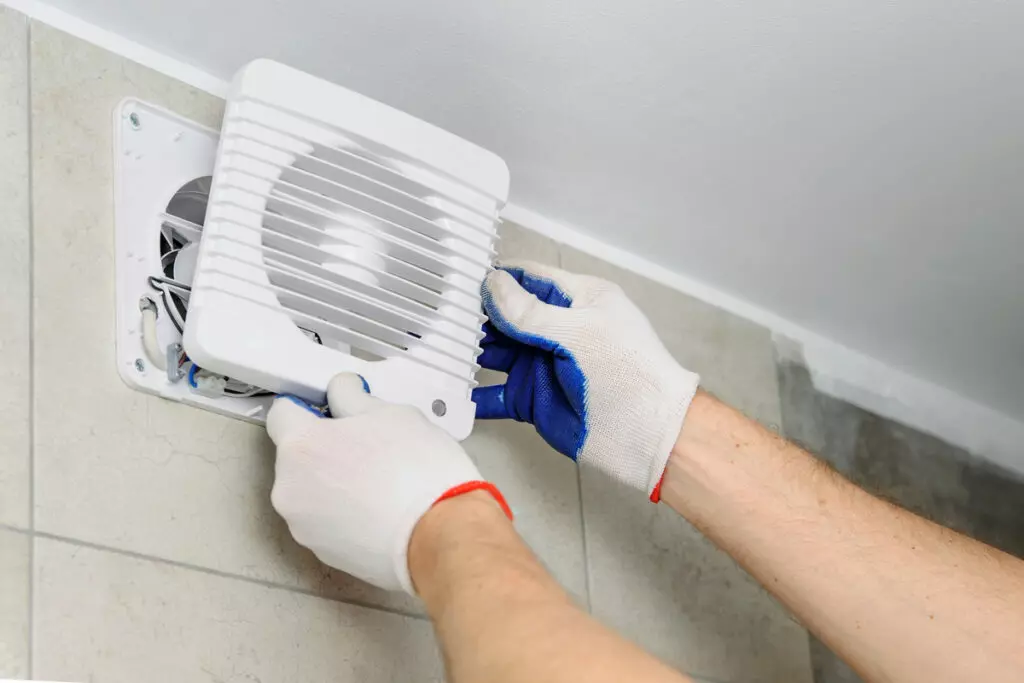
2. Remove the Fan Cover
Next, remove the vent cover using a screwdriver. Most fans come off with just a few twists. Gently pull on the vent cover and disconnect it from the mounting wires.
3. Clean the Cover with Warm, Soapy Water
Now, we can start with cleaning the vent cover first.
Simply fill your sink or a basin with warm water and dish soap and let it soak for a few minutes. Scrub the vent cover with a damp cloth or soft bristle brush to remove as much debris as possible.
Place the fan cover on an absorbent towel to completely dry.
4. Clean the Fan Blades and Motor
Take your vacuum to remove the trap dust from the inner fan unit. Switch to a brush attachment for the fan motor components.
Remember to do this with a LIGHT touch to prevent damage. It would help to keep a flashlight handy to ensure you do not miss any spots.
Once the fan motor and fan blades are clean, take a damp microfiber cloth and wipe down the excess on the fan components.
How to Clean a Bathroom Fan with Light
The same principle applies if your bathroom exhaust fan has a light fixture.
After detaching or unscrewing the vent cover, you will see mounting wires that power the light. Disconnect those wires to remove the vent cover.
DO NOT submerge your fan in water if it has a light!
Instead, use a vacuum with a crevice attachment to suck out any caked-on dust, and use a towel to dry it off.
How to Clean the Bathroom Fan Cover
Removing the exhaust fan cover is the first step to a completely clean fan. Depending on the type of vent fan you have, you should be able to easily pull it off its place.
Start by gently pulling the cover off or remove the mounting screws with a screwdriver. Once the cover is out of place, disconnect the wires.
Soak the cover in warm water and dish soap, and use a soft brush or a sponge to remove all that grime. Afterward, use a microfiber cloth to wipe the surface clean.
Let the cover air dry completely before placing it back.
Cleaning the Fan Blades
After cleaning the cover, you can move on to the fan motor and blades.
Some fan assembly units can be completely removed from the fan housing. If possible, use a screwdriver to unscrew the fan from its slot. Otherwise, your fan may not be screwed on to begin with.
Before you start cleaning, unplug the power source from the fan housing and the surrounding recessed housing. The fan should pop right out of the recessed housing.
Take a damp cloth and wipe away the excess. You can use an electrostatic duster or vacuum to remove any thick clumps.
Once cleaned, lightly dampen a microfiber cloth and wipe the fins and fan housing down.
Tips for Cleaning the Fan’s Housing and Motor
Here are some additional tips to consider when cleaning the fan’s internals.
- Remember to vacuum and clean the fan GENTLY. Hard strokes may cause the blades to warp.
- Compressed air or forced air makes for a good dust remover as well.
- Wear gloves. Your fan will get very dusty, and you won’t want to get your hands dirty.
How to Clean Bathroom Fan Without Removing It
The same cleaning process applies if your fan is not removable from its slot! You will need a sturdy ladder to reach the top of the fan.
Use a screwdriver to detach the cover or twist it out of its place.
From there, take your vacuum and gently suck out any debris inside the motor. You can also use a paintbrush or toothbrush to get into the hard-to-reach places.
Dampen a microfiber cloth and wipe the whole thing down before letting it air-dry.
The Appropriate Frequency to Clean a Bathroom Fan
A safe time frame to clean a bathroom exhaust fan would be every 3-6 months. That should be the necessary frequency of bathroom cleaning.
However, it depends on the frequency of use and the amount of debris and moisture present.
Regular cleaning ensures your fan performs in tip-top shape. Only then can you enjoy proper ventilation and clean air.
Maintaining Your Bathroom Fan Post Cleaning
Now that you’ve cleaned your fan, the next important step is maintenance. Let us offer a few maintenance tips that have worked wonders.
Tips for Regular Maintenance and Cleaning
- Clean your fan every six months. Do not let debris and moisture build up over long periods, as the fan may stop working.
- Do not use harsh cleaners, as they may corrode the fan’s material. Limit your comprehensive bathroom cleaning checklist to natural products only.
- Wear gloves and a mask if you must. Your environment will get dirty, and the dust may make it hard to breathe.
- Small brushes like a paintbrush or old toothbrush may help you scrub dirt off every nook and cranny.
Frequently Asked Questions
Here are the answers to some common questions to help you with your research.
Can I Clean My Bathroom Fan Without Removing It?
Yes, you can clean your fan while leaving it in its place. Start by removing the cover and vacuuming out any thick clumps of debris.
How Often Should I Clean My Bathroom Fan?
You should clean your bathroom fan every 3-6 months. Only then can you ensure optimal air quality and a mite-free environment.
Do Bathroom Fans Need to Be Cleaned?
Yes, it is important to clean bathroom fans regularly as they gather dirt over time, which may hinder their performance.
Can I Use Any Specific Cleaning Agent for My Bathroom Fan?
Yes, you can use other cleaning agents, such as lemon juice and baking soda, but avoid harsh commercial cleaners as they may damage the fan’s finish.
Is It Necessary to Clean the Fan Blade Separately?
Yes, it is necessary to clean the blades separately for the fan to operate smoothly and without interference from dust and grime.
Conclusion
There you have it! You now know how to clean an exhaust fan!
Your bathroom is probably already dirty enough as it is, so let the exhaust fan do its job by ensuring it stays clean and dirt-free.
I understand that cleaning an exhaust fan may be a hassle, but it’s worth it, in the end, to not have to deal with growing molds and smelly odors all the time.
Written by
Maria DeSouza

Maria De Souza is a committed and accomplished entrepreneur in the cleaning industry, possessing an extraordinary blend of leadership, vision, and knowledge. As the proud owner of Onix Cleaning Services in Boston, Massachusetts, Maria has over two decades of experience in the industry, delivering unparalleled service and maintaining the highest standards of cleanliness.
