A Complete Guide on How to Clean Your Kitchen Exhaust Fan

A clean kitchen is a must when preparing food items. In our experience, you do not need to be an award-winning restaurant owner to have the proper knowledge for keeping a clean station to cook in.
Thus, knowing how to clean your kitchen exhaust fan is a great investment. A kitchen exhaust ensures air ventilation to remove bad smells and as much grease and grime as possible.
The maintenance of such fixtures is quite simple to understand, only needing consistent practice, a lot of soap, and a good sponge.
Allow us to instruct you on everything you need to know to effectively clean your kitchen exhaust fan.
Tools Needed to Clean a Kitchen Exhaust Fan
A clean exhaust fan is integral to a sanitary and organized kitchen space. Here is a list of the essential tools you need to properly care for your kitchen exhaust fan.
List and Description of Essential Cleaning Tools
Before you can start cleaning your Kitchen exhaust fan, you will need the following:
- Soft nylon scrub brush: A utensil for scrubbing away grease.
- A large container: A large basin to rest the dirty kitchen filter on, such as a large pot, a glass dish, or a sheet pan.
- 1/2 cup baking soda: 1/2 ingredient for the cleaning solution.
- 1-2 tablespoons degreasing dish soap: 1/2 ingredient for the cleaning solution.
- Boiling Water: Hot water to wash away the accumulated debris and fully submerge the filter.
- Spray-on degreaser or vinegar solution: A more thorough cleaning solution for tougher grease build-up.
- Paper towels, cleaning rags, or toothbrush: An instrument to spread your detergent or baking soda over the filter.
Step-by-Step Guide on How to Clean Kitchen Exhaust Fan
You should become familiar with the process as you now incorporate exhaust fan cleaning into your kitchen cleaning routine. The whole cleaning process should only take 20-50 minutes at most.
A few steps may change, but the process generally goes as follows:
Removing the Fan Cover and Hood
You can start by unplugging the exhaust fan and other electrical appliances. This precaution ensures no sudden electric surges appear. As you begin working on the filters inside the fan, make sure to avoid putting yourself at risk.
Afterward, carefully remove the grease filter or range hood filter using gloves. The grease filter can be found on the underside of the range hood, which is the side facing down onto the kitchen top.
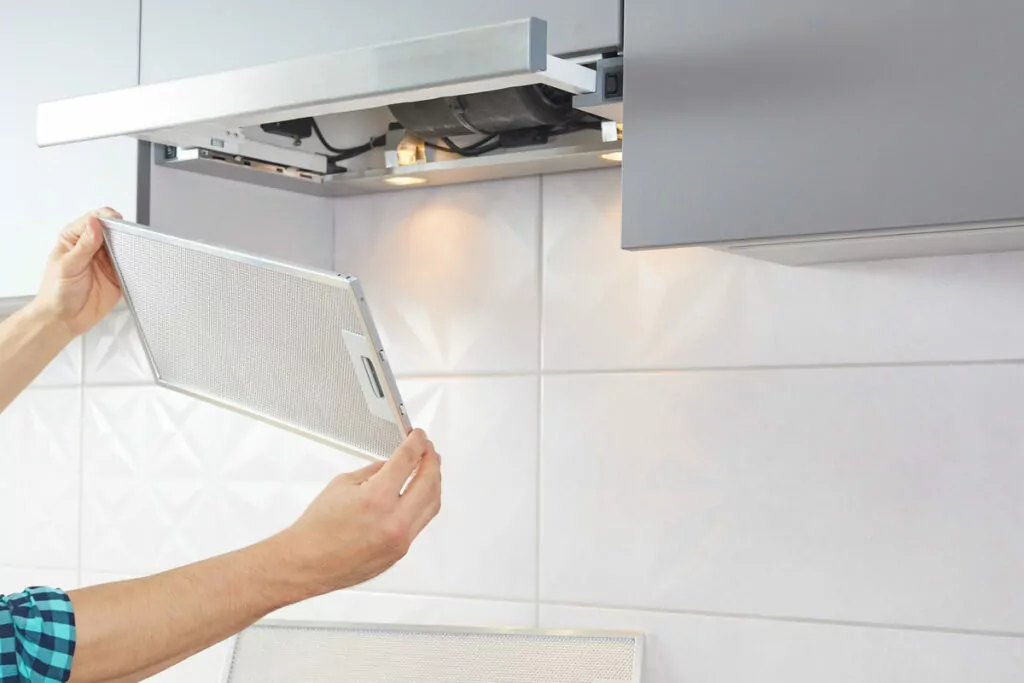
You will need to unhook any levers and tabs holding the metal mesh to the rectangular frame. However, if you face any resistance, you may use a butter knife or the end of a spoon to edge the grease filter mesh.
Next, rest the grease filter into a sealed sink or any other large container like a glass baking dish to submerge the mesh on all sides. Keep in mind the basins will get very dirty when you start cleaning.
Prepare your choice of cleaning solution, whether made from baking soda and dish soap or vinegar. Pour a cup of cleaning solution onto the basin until the filter is completely submerged.
Let the mesh soak for 15-30 minutes as the grease and other debris melt away. Afterward, scrub the easily removable grease with a sponge or a bristle brush away from the filter mesh.
If the grease remains, leave the grease filter completely submerged in the dish for a few minutes. Once the filter is clean of grease, rinse with hot water to remove any remaining debris or cleaning solution.
Cleaning the Fan Blades
Remove the filter before the cleaning solution cools down, or risk the removed grease settling back onto the mesh.
Air dry the filter for approximately two hours using a paper towel. Letting the air filter dry removes any chance of moisture or risk of electrical malfunctions as you re-insert the frame.
As you wait for the mesh to be completely dry, you can clean the exhaust fan blades with a sponge or cloth for any grease stains. However, do not spray any chemicals directly onto it.
Spraying chemicals on the exhaust fan blades can wet the internal components or risk damage. Instead, wipe the grease filter with a damp cloth in the cleaning solution.
Important Note: Check that exhaust fan blades are functional beforehand, as an application of grease with a soft cloth may be needed if the blades are rusty.
A clean exhaust fan must have no excess moisture or grease whatsoever. Excess moisture can cause malfunctions to the inner components, where excess grease can still build up before future cleaning.
Cleaning the Fan Cover and Hood
After the exhaust fan blades, you can also focus on cleaning the hood. Dust, grease, and debris are the main culprits for an exhaust fan’s malfunctions or hindered operating ability.
You can clear the stovetop of any utensils to be able to properly soak the surface with a degreaser (using a damp cloth) for 15 minutes. The degreaser can either be a commercial product or a homemade vinegar cleaning solution.
After 15 minutes, use paper towels to remove any excess cleaning solution and grime. Use a nylon-bristled brush to scrub away harder bits of residue with a spritz of degreaser.
Lastly, use a clean cloth damp with warm water and rinse the interior of the hood filter to remove grease build-up or remaining cleaner. Any residues or build-ups can become a fire hazard.
However, despite removing as much grease as possible, you may need to replace your exhaust hood filter due to build-up clogging the mesh.
There are two kinds of filters to consider;
- Ducted hood filters: These stainless steel filters vent air and need frequent cleanings, but getting a replacement can be cheaper.
- Ductless hood filters: These ventless filters are made from charcoal and need to be replaced every few months, at least twice a year
Duct Cleaning: What You Need to Know
In most cases, a clean range hood filter would suffice in keeping your kitchen clean; there is usually no need to clean the ductwork. Ductwork cleaning is preventable in most cases.
However, you may need to clean the duct if the range hood filter is especially dirty from neglect or if you’ve recently purchased a house. Ductwork may also be necessary due to improper filter cleaning.
Another major reason will be if your home or, at the very least, your kitchen has many indoor air pollutants. These pollutants can often result from frequent indoor smoking or kitchen fires.
Reassembling Your Kitchen Exhaust Fan
Wait for the clean kitchen exhaust fan and grease filter to dry before reassembling. Be sure you have no remaining grease to wipe away or components to clean.
Re-insert the grease filter back into the frame the same way you remove the filter. You only need to rehook and secure the filter onto its latches and the other locking mechanisms of the hood.
After re-inserting the filter, You can plug the exhaust fan into a plug to see if the appliance’s performance has improved.
Should there be no significant improvement, do not repeat the cleaning process and call a cleaning service instead. You have now reassembled a clean exhaust fan to filter and ventilate your cooking space.
Effective Cleaning Methods for Stubborn Grease and Grime
A clean kitchen exhaust fan filter is crucial for any home or restaurant. A lack of an air filter can lead to your home smelling foul. The air may also become unbreathable.
Consider the following methods when trying to clean your filter or other kitchen appliances.
Using Baking Soda and Dish Soap
A homemade cleaning solution should effectively clean your filter if you do not have any dishwashing liquid on hand.
Mix 1/2 cup of baking soda and a few teaspoons of dish soap onto a basin, sink, or sheet pan to create the cleaning solution. Then, set it to boil on the stove for hot water to mix the two.
Baking soda or sodium bicarbonate is a mild abrasive strong enough to remove debris, whereas liquid dish soap has surfactants, making it easier to wipe the debris away with the help of the baking soda.
The baking soda and dish soap together are very safe and non-toxic. The combined cleaning solution can effectively dissolve grease and ensure your safety while cleaning.
How to Use a Commercial Degreaser
You simply apply the cleaning solution or a commercial degreaser onto the surface of a filter, then let it settle. After settling, wipe it with a sponge or paper towel.
Lastly, raise the filter with hot water to remove any residue. Mixing a commercial degreaser with another product is ill-advised.
When to Consider a Professional Cleaning Service
You should consider a professional cleaning service if the kitchen exhaust filter still malfunctions despite your attempts.
This malfunction may need the eye of a more experienced professional. You can not risk having an amateur clean it due to the risks of a fire that come with underperforming appliances.
Another reason would be if you and the other occupants of the building are quite busy. If you cook a lot of food but don’t have time to clean the exhaust fans, hiring professionals would save you time and effort and keep you safe.
Otherwise, grease and smoke may build up and cause electrical issues or fires when left unattended.
Safety Precautions to Consider While Cleaning Your Kitchen Exhaust Fan
Before cleaning your kitchen exhaust fan filter, it’s essential to take the appropriate safety measures.
Some pieces of equipment and practices to consider before cleaning are the following:
Protective Wear
Cleaning exhaust fan filters involves working with chemicals and other hazardous materials. We recommend using these pieces of protective gear:
- Gloves: Wear gloves to resist heavy chemicals, ambient heat, and electricity.
- Face masks: The mask prevents the chemicals’ toxicity from damaging the lungs.
- Protective eyewear: The goggles don’t let the grease hamper your eyesight as you clean.
- Slip-resistant shoes: The job will have you deal with slippery grease. This will keep you from sliding around in case of spills.
Electrical Safety
There are other electrical safety tips to remember aside from switching off and unplugging the exhaust fan to prevent electrical surges.
Based on our observations, you can leave your exhaust fan on for at least two hours while cooking. Leave it on for at least 10-15 minutes to clear up any smoke or grease.
Turn it off to avoid risking electrical malfunctions. We recommend investing in a stronger motor if you cook for longer periods more frequently.
After-Cleaning Hygiene and Sanitation
After cleaning your exhaust fan filter, clean your kitchen area. You can clean it the same way you usually clean it.
Wash and return any large pot or utensils you used to properly clean the filter while using the cleaning solution and a sponge to wipe away all surfaces.
As you wipe and rinse your kitchen exhaust fan filter, keep your cleaning solution in a large plastic bin away from children. Although non-toxic, you should still avoid leaving it unattended to be interacted with by pets or children.
Maintenance Tips for Keeping Your Exhaust Fan Cleaner, Longer
In our experience, regular maintenance of your exhaust fan is paramount. It leads to a safer cooking environment and longevity for your equipment and the people around you.
We recommend the following tips for maintaining a clean range hood filter and fan blades;
- When selecting a degreaser, be sure it is compatible with the hood’s material, typically stainless steel or painted metal.
- You can prevent streaks on the range hood by polishing them with olive oil and a microfiber cloth.
- Be sure to dust the decorative hood weekly and clean it monthly to avoid degradation.
- Should your range hood be made from copper or brass, polish it regularly with a soft cloth or risk developing an aged patina.
- Remember that dust and grease can weigh down the hood and other components together.
- If your kitchen exhaust fan filter is more than ten years old, we recommend that you replace it, regardless of cleaning
Regular Cleaning Schedule
We encourage cleaning your kitchen range hood filter based on how much you plan to cook. If you cook daily, we recommend cleaning the hood and filter every month.
That said, a seasonal cleaning will suffice against grease and dust accumulation in most cases. Although, we also recommend cleaning your filters before a holiday feast (ignoring the hood).
You know when cleaning is necessary if dust particles are present or there is a foul smoke-like odor.
Another significant indicator would be the filter motor running louder than usual. This malfunction indicates a clogged filter or ductwork filled with grease and debris.
You can also test if your kitchen exhaust fan works as intended by placing a piece of paper over the vent. Your vent works if the paper gets sucked in and held in place.
Practice of Good Kitchen Hygiene
Besides keeping your filter clean, here is a comprehensive kitchen cleaning checklist to maintain your kitchen’s hygiene and sanitation:
- Take inventory of your pantry: Check your inventory to verify the expiration dates of your ingredients, especially for opened items.
- Sanitize the fridge: When thawing your fridge, spray with a non-toxic antibacterial spray while there are only a few items inside.
- Clean your oven: Clean every removable rack with a bristle brush and cleaning solution.
- Empty the toaster: Emptying the toaster of its debris will extend its lifespan.
Choice of Quality Cleaning Materials
Besides baking soda and dish soap, the best cleaning materials for kitchen exhaust fans include:
- Lemon juice: Lemon juice with warm water is effective as a degreaser and has the added benefit of smelling pleasant
- Hydrogen peroxide: Hydrogen peroxide can enhance the disinfectant properties of a cleaning solution.
- Olive Oil: Olive oil is a safe product to rinse the metal surface of some filters and their hoods with.
- Essential Oil: Essential oil can counteract the strong smell of cleaning materials, as well as the sour smell of vinegar.
Frequently Asked Questions
After providing a guide on cleaning a kitchen exhaust fan, you may still have more questions about your kitchen cleaning routine. Here are the answers to some of the most common ones.
How Often Should I Clean My Kitchen Exhaust Fan?
It is best to routinely clean your kitchen exhaust fan every six months. Although we recommend cleaning the exhaust every three-four months, you should cook frequently.
However, you should have a professional look into your kitchen exhaust fan to ensure your safety at least once a year.
A dirty kitchen exhaust fan causes moisture to build up within your building’s ductwork. This build-up will lead to mold and mildew infestations, leading to more health problems.
Cleaning your exhaust fan more frequently also improves airflow, thus increasing energy efficiency.
Can I Use Vinegar to Clean My Kitchen Exhaust Fan?
Yes. Vinegar is an effective degreaser when it comes to cleaning. Vinegar can easily remove grease due to the 5% acetic acid found in vinegar.
Acetic acid is powerful enough to remove grease without creating potent fumes or chemicals. Any odor from the vinegar will dissipate within the first few minutes of applying.
However, it’s important to note that vinegar easily corrodes the shine on hard surfaces. These hard surfaces include marble, granite, wood, and other porous tiles.
What Should I Do if My Exhaust Fan Is Not Working Properly After Cleaning?
In our experience, calling professional cleaning services would be the best call. The issue may need a professional eye to determine the malfunction of your exhaust filter.
This option is especially relevant should you be a new occupant of a recently built or renovated house. In these cases, an issue with your kitchen exhaust fan filter or excess grease can become a fire hazard if handled improperly.
Are There Any Professional Services Available for Cleaning Kitchen Exhaust Fans?
Yes, many different cleaning services are available for cleaning your kitchen exhaust fan. These range from regular heating, ventilation, and air conditioning (HVAC) companies to more specialized duct companies.
Duct companies have more specialized equipment and training compared to typical HVAC companies. The need for cleaning the ducts is uncommon due to thorough range hood maintenance.
Can I Use the Dishwasher to Clean Fan Parts?
You can use the dishwasher to clean your kitchen exhaust fan. You only need to disassemble the appliance into the fan blades, filters, and both sides of the fan’s covers.
However, remember to remove any electrical components before inserting them into the dishwasher. The cleaning process of the dishwasher is strong enough to remove any debris and grease trapped inside.
Conclusion
Now you know the value of a clean exhaust fan filter for your kitchen. You also understand the vital considerations and risks of a poor cleaning job, as well as when to call in a professional cleaning service to ensure your kitchen’s cleanliness.
To clean your fan, you must remove the filter inside the exhaust fan and submerge it in a cleaning solution. Then wipe away the diluted grease.
After letting the air filter dry, the crucial part is reassembling the appliance and checking its performance.
A properly working kitchen exhaust fan filter means clean air and fresh food for everyone and ensures the safety and proper maintenance of your household.
Written by
Maria DeSouza

Maria De Souza is a committed and accomplished entrepreneur in the cleaning industry, possessing an extraordinary blend of leadership, vision, and knowledge. As the proud owner of Onix Cleaning Services in Boston, Massachusetts, Maria has over two decades of experience in the industry, delivering unparalleled service and maintaining the highest standards of cleanliness.
