Everything You Need to Know About How to Clean Shower Head
Ensuring cleanliness in our homes should extend to the often overlooked shower head.
This article delves into the importance of regular shower head cleaning, outlining common issues like build-up and clogging and tips and tricks on making cleaning easier.
Why is Cleaning Your Shower Head Important?
Your shower head is susceptible to the build-up of many external elements, especially if you don’t deep-clean your shower head.
These include soap scum, loose debris, harmful bacteria, mold, dust buildup, calcium deposits, and more. If you do not remove these foreign materials, your next shower session may be less enjoyable.
Let’s look at some reasons why shower head cleaning is important.
Impact on Water Pressure
You will face poor water pressure if you do not give your shower head a good clean every so often.
All the materials clogged up in the nozzles (tiny holes the water comes out of) can negatively impact your shower experience.
Based on experience, the liquid in the shower head ends up spraying in multiple directions at different pressures, which should not be the case.
Your shower head might’ve fallen victim to mineral deposits from the hard water.
If you notice that the liquid doesn’t flow freely and fails to provide smooth and consistent pressure, your shower head may have a lot of mineral buildup and could use a thorough cleaning.
Health Implications of Not Cleaning Shower Heads
You would not want ANYTHING in your bathroom collecting mold buildup or bacterial growth. These could spread from your shower head to your toothbrush, faucet, or toilet bowl.
Unless you give your shower head (and the rest of your bathroom) a deep clean, you could be left feeling sick for days or worse.
Lifespan of the Shower Head
Your shower head is only suitable for around 6-8 months, so using only one shower head forever is not ideal.
Regular cleaning is paramount if you do not want to keep replacing your shower head.
Recognizing When Your Shower Head Needs Cleaning
It’ll be easy to tell when your shower head needs a good scrubbing. During your next shower, watch out for these signs that your shower head is due for a cleaning.
Signs of Limescale Build-up
Limescale comes from hard water buildup, which can cause blockages and poor water flow.
Some signs of limescale include decreased water flow, whiteish residue on the shower head, and an uneven or rough water flow.
Reduced Water Pressure
If your shower is giving off poor or weak water pressure, it’s a sign that your shower head needs to be cleaned and cleared of debris.
Limescale buildup and mineral deposits on the flexible rubber nozzles can restrict the water flow in the shower.
Spray Direction Variability
A clear sign that your shower head needs to be cleaned is if the water from the holes sprays everywhere.
If your shower sprays in all directions, that is a sign that it must be cleaned.
How to Clean a Shower Head
It’s easy to clean a shower head and can be done using materials found in your household! Allow us to break down what you need to do to start.
Inspection and Initial Cleaning
If you see debris and limescale buildup, it’s clear that your showerhead needs to be cleaned.
Start by gently scrubbing what you can with your finger or a small toothbrush to dislodge any noticeable material buildup on the nozzles.
Detaching the Shower Head (Optional)
Not all shower heads are removable.
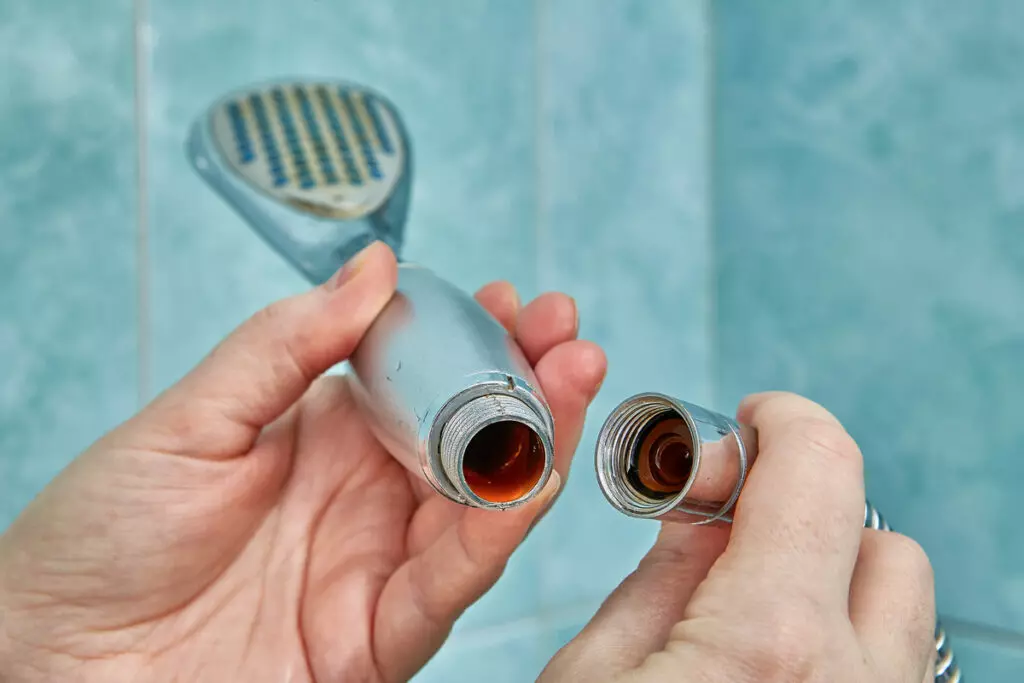
To remove the shower head from the arm, gently unscrew it off the wall using a wrench. Otherwise, you can leave it be.
Deep Cleaning Shower Head With Vinegar
If you remove the showerhead, take a plastic bag or bowl and fill it with vinegar and one part water.
Distilled vinegar, white vinegar, or apple cider vinegar work just fine! Adding half a cup of baking soda or lemon juice into the solution will also help greatly.
Let the filter screen and shower head soak in the bag for a few hours. You can leave the showerhead completely submerged for several hours or even overnight if it is really dirty.
TIP: If you have nickel-coated shower heads, DO NOT soak your showerhead in the vinegar bag for more than 30 minutes. The acidity may cause damage to the finish.
Take the showerhead out of the bag and run hot water under it to rinse off any excess vinegar soak. You can then use an old toothbrush to scrub off any additional calcium deposits.
Use a toothpick or needle nose pliers to pick out stubborn hard water stains, debris, or limescale stuck in the tiny nozzles or filter screen. Dry it up with a soft cloth or microfiber cloth.
If your showerhead is NOT removable or if you would rather keep it in its place, the same process applies! Fill a plastic bag with water, vinegar solution, and baking soda, and soak the showerhead in place. Use a rubber band, cable tie, or zip tie to keep it in place.
Let the shower head soak in the bag of vinegar for several hours. You can also leave your showerhead overnight. After soaking, remove the rubber band and run hot water on the showerhead to flush out any vinegar or baking soda, then dry it.
Reattaching the Shower Head
After soaking, scrubbing, and rinsing, put the showerhead back into place.
Before attaching the showerhead, clean the shower arm with a clean cloth. You can use an old toothbrush to remove mineral buildup and hard water stains.
Attach the new, clean shower head by turning it clockwise to screw it in place.
Tools and Materials You Will Need
Here’s a rough breakdown of what you need to clean a shower head.
Materials and Tools List
- Plastic bag or bowl
- Water
- Vinegar (distilled white vinegar, white vinegar, or apple cider vinegar)
- Baking soda/Sodium bicarbonate
- Lemon juice (optional)
- Rubber bands (If cleaning without removing shower head from shower arm)
- Soft cloth
- Toothbrush
- Wrench
Safety Precautions
- Before you remove the shower head from the shower arm, turn off the water supply.
- Protect your eyes and skin when handling the vinegar soak.
- Avoid harsh cleaners and bleach, as these may damage the material of the showerhead.
- Rinse the showerhead very thoroughly.
- Work in a well-ventilated area to air out any strong fumes.
Step-by-Step Guide
Here’s a step-by-step guide on the proper way to clean a shower head using distilled white vinegar.
Pre-Cleaning Steps
- Have your necessary supplies ready.
- Turn off the water supply.
- Inspect your shower head for any mold, debris, or mineral buildup. Scrub off these mineral deposits using your finger or a toothbrush.
- Do the same with the filter screen and nozzles.
Main Cleaning Steps
- Fill a plastic bag with water and vinegar (distilled white vinegar).
A. You may add baking soda or lemon juice for additional cleaning power.
B. DO NOT use bleach, a harsh chemical that could ruin your showerhead. - Leave the shower head to soak in the bag for several hours. You may leave it overnight if it requires a deep cleaning. Secure it with a rubber band.
- After soaking, rinse off the solution.
- Use a toothpick to scrub off excess debris or mineral deposits in the nozzles.
- After the rinse and scrubbing, use a gentle cloth to wipe it down.
Post-Cleaning Steps
- Attach the head back to the shower arm.
- Turn on the water supply and check the water flow and pressure.
- Wipe down the shower head to remove any excess vinegar.
Advanced Cleaning Procedures for Persistent Build-up
Try more advanced solutions if you still experience problems after a thorough cleaning.
We found that a stronger vinegar mixture helps eliminate buildup a lot FASTER, so you can try adding more solution to your bag.
You can also use a more potent cleaning agent or a descaling product to remove mineral deposits.
Otherwise, consider replacing your shower head altogether, preferably with one with natural rubber nozzles, for easy cleaning.
When to Opt for Commercial Cleaners
I recommend using commercial cleaners for SUPER heavy buildup, as they can handle stubborn deposits better.
Although they are more efficient and less time-consuming, they are not ideal as they contain harsh chemicals that could damage your shower head.
Safety Precautions When Using Commercial Cleaners
- Read the instructions to prevent misuse of the cleaner.
- Wear protective gear such as goggles and gloves.
- Keep your work area well-ventilated.
- Test your cleaner on a small surface first to check how much damage it does.
- Rinse the cleaner THOROUGHLY.
Procedure for Cleaning With Commercial Cleaners
- Flush any excess debris from the nozzles and head before applying the cleaner.
- Apply the commercial cleaner around the entire shower head. Let the cleaner sit and do the work.
- Dry off the cleaner using a gentle cloth or sponge.
Maintaining Your Shower Head
A routine bathroom cleaning can go a long way, especially for something as overlooked as the shower head.
Routine Cleaning
Routine cleaning is vital for maintaining overall shower cleanliness. Doing so keeps deposits out and prevents heavy build-up.
Prevention of Clogging and Buildup
Failure to maintain your showerhead only leads to the build-up of elements, such as bacteria, mineral deposits, limescale, and more.
These things clog the shower and affect water pressure, which affects your overall shower experience. You’ll need to clean your shower head to prevent that from happening.
When to Consider Replacing Your Shower Head
If all else fails after several tries, you can replace your showerhead with a new, muck-free one! The head not working may be a sign that the problem lies within the internals of your shower head, so best to get it replaced.
Frequently Asked Questions
Let’s answer some more of your shower head questions.
How Often Should I Clean My Shower Head?
We recommend cleaning your shower head once a month. Regular cleaning is best to keep calcium and mineral deposits out.
How Long Should I Soak My Shower Head in Vinegar?
Soaking usually lasts about 6-8 hours to maintain a clean shower head, but it can go longer than that if the build-up is severe.
Can Vinegar Damage My Showerhead?
Yes, prolonged exposure to vinegar may cause damage to chrome, brass, or nickel showerheads. Do not submerge for too long to prevent ruining the finish.
Can I Clean My Shower Head Without Removing It?
Yes, you can clean your showerhead without removing it from the shower arm. Simply soak the showerhead in the bag of vinegar + baking soda solution and secure it with rubber bands.
What Can I Do if My Shower Head Is Still Clogged After Cleaning and Soaking?
Replace your showerhead with a new, cleaner one. That way, you won’t have to worry about any build-up!
Conclusion
Establishing a routine for shower head cleaning is vital for its longevity, optimal performance, and maintaining a healthy environment.
Remember, neglecting this seemingly insignificant task could lead to health problems and compromised functionality, so keep your shower head sparkling clean to enjoy a more refreshing shower.
Written by
Maria DeSouza

Maria De Souza is a committed and accomplished entrepreneur in the cleaning industry, possessing an extraordinary blend of leadership, vision, and knowledge. As the proud owner of Onix Cleaning Services in Boston, Massachusetts, Maria has over two decades of experience in the industry, delivering unparalleled service and maintaining the highest standards of cleanliness.
